Search This Blog

Thursday, October 31, 2013

Run Hyper-V Manager, MS Visio and MS Project from Surface RT or Nexus 7 FHD Using Presentation Virtualization


I have playing around with my new Surface for quite some time. Really love the feel of the touch screen and Windows 8.1 RT. It’s preloaded with MS Outlook 2013, MS Word 2013, MS Excel and MS Power Point. Great application for people who are always on the move but I find it a bit lacking especially as a consultant, I need to always use Hyper-V Manager snap-in to remote into customer environment and manage multiple virtual machines, MS Project to do project scheduling for customer and MS Visio for drawing virtualization architecture. But guess what Surface RT cannot install application except app from MS Store?

How about my Nexus 7 FHD? Even worse, no MS Office application unless I’m using Quick Office which don’t give me similar function as MS Office.

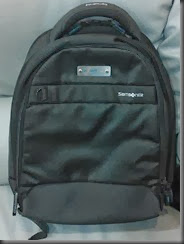
It come to the the point that my this small laptop bag need to carry 3 devices: DELL Laptop, Nexus 7 FHD and Surface.

laptopbag

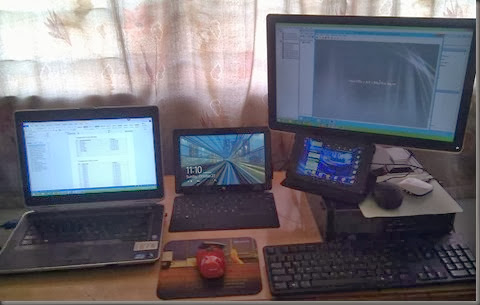
When at customer place, customer surprise with how many gadget that I carry when go to work. Hey!… I’m an IT Guy!

myworkplace

So next question is how do I solve my problem and get the following program inside my Surface?

  • Hyper-V Manager snap-in
  • MS Visio 2013
  • MS Project 2013

Interest to know more, please continue reading….

1st step:-

  • Setup RDS Session Host –Windows Server 2012 R2 on a Virtual Machine

image

2nd step:-

  • Enable features Hyper-V Manager snap-in , install MS Office 2013 Application, MS Project 2013 and MS Visio 2013 on RDS Session Host.

3rd Step:-

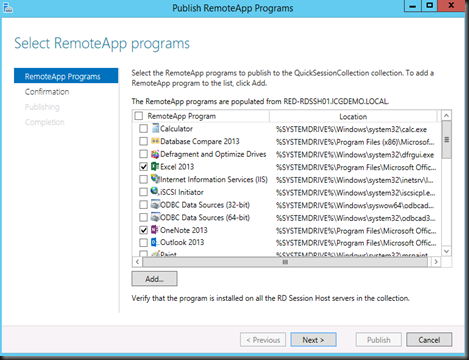
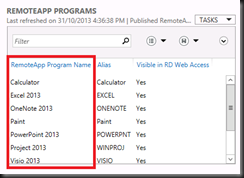
  • Configure and Publish RemoteApp on RDS Session Host

2

3

4th Step:-

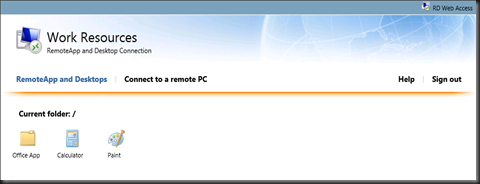
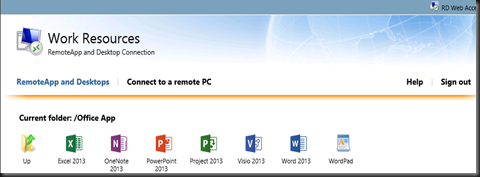
  • Verify using Internet Browser. I’ve create a group : Office App which contained the entire MS Office 2013 Application

7

8

Now the fun part on testing using Surface from LAN / Internet:-

  • LAN – use Ethernet or wireless connection
  • Internet – use VPN / Direct Access back to office

On Surface

5th Step:

Configure RemoteApp and Desktop Connection URL on Surface

image

image

Once connection established, you will able to see your entire RemoteApp program at Start. Here is how it look like (red box)

image

Hyper-V Manager snap-in on Surface:-

image

All application work great!

Last test on Nexus 7 FHD (running android 4.3)

1st Step:-

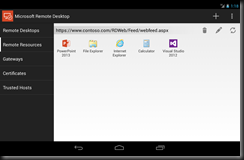
  • Use MS Remote Desktop Client App for Android and Configure your RDS Session Host settings.

image

2nd Step:-

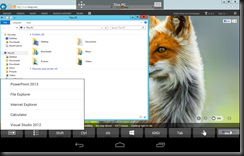
  • Connect to RDS Session Host. RemoteApp displayed on the android 4.3.

image

3rd Step:-

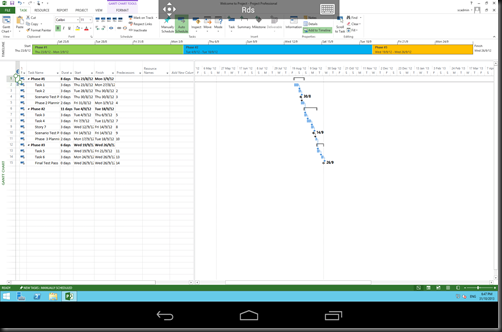
  • Test MS Project 2013 Application running on Nexus 7 FHD (android 4.3)

2013-10-31 10.48.11

Updated: [31 Oct 2013]

Just installed Google Chrome on RDS and enable user profile disk in Windows Server 2012 R2. User profile disks store user and application data on a single virtual disk that is dedicated to one user’s profile.

It is working fine as well.

Now I can bring either Surface or Nexus 7 FHD everywhere without worrying about application. Just get my application installed on RDS Session Host and with Internet access I would be able to work anywhere & anytime.

Wednesday, October 30, 2013

Create Windows Server 2012 R2 and Windows 8.1 Base Images


Last couple of days, Microsoft has official release Windows Server 2012 R2 and Windows 8.1 RTM to public. It is time to create a base image of these operating system and use by VMM to deploy VM.

I’ve use Convert-WindowsImage.ps

Windows Server 2012 R2

image

Windows 8.1

image

Based on my testing, it can create a dynamic or fixed VHD/ VHDX Generation 1 VM without any problem.

You can download the script from here

Note:- At this moment, this script is NOT supported or tested to create Windows Server 2012 R2 and Windows 8.1 . Use it at your own risk. However, it work fine on my environment. So give it a try and see if it work on your side.

Related post:-

Create SysPrep VHD and VHDX for Windows Server 2012 and Windows 8

Tuesday, October 29, 2013

Session: What's New in Windows Server 2012 R2 Hyper-V


In this session, i have presented a session at Microsoft Malaysia Auditorium about the new features of Windows Server 2012 R2 Hyper-V.

Date; 30 Sept 2013

Attended by : 45

You can view the slide from here:-

Session: Storage Options in the Cloud OS


During Microsoft Cloud OS Day at Singapore, i have presented about Storage Spaces, as well as other options for using storages when deploying a Virtualization architecture and Hybrid Cloud Integrated Storage
Technology coverage: Windows Server 2012 R2, Stor Simple,

Date: 17 Oct 2013

Attended by: 800

You can view the slide here:

Picture :-

image

Session :- Why Hyper- V is Your Best Virtualization Cloud OS Platform?


In this session, i and Raymond Chou has presented during Beyond Virtualization session at Microsoft Malaysia Auditorium. We have presented about Microsoft Cloud OS Vision, Windows Server 2012 and what's coming in R2 in term of virtualization, storage, network and recovery services.

Session date:- 28 August 2013

Attended by : 65 people

View the slide from here:

Friday, October 25, 2013

Getting Started With Surface


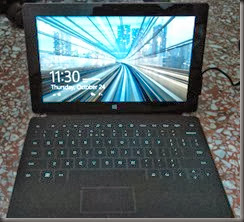
My new gadget : Surface RT came at the right time for my VDI project.

2013-10-24 23.30.542013-10-24 23.30.30

Here is some guidelines that I do once I get my hand on Surface RT and the guide probably useful for beginner. Let get started:

1. Once perform initial setup by Windows, the recommend step is perform Windows Update. Update your Surface with latest windows Update. To do so, click Settings | Change PC Settings | Update and Recovery | Windows Update | Click “Check Now”

2. After complete Windows Update, go to Microsoft Store and select Update to Windows 8.1. It will take a while to download 2.1 GB of update. In case of any problem during update to 8.1, you can download the Microsoft Surface RT Recovery Image from http://www.microsoft.com/en-us/download/details.aspx?id=40810

3. Then, create a USB recovery Drive in case you need to reset it to factory condition. Go to Control Panel | Recovery | Click Create a recovery drive. Insert a minimum of 8GB USB drive into your surface RT. Once complete, keep it in a safe location

4. For ease of login, change it to pin rather than keying in your Live ID password. Go to Settings | Change PC Settings | Account | Sign-in options | select PIN or Picture Password.

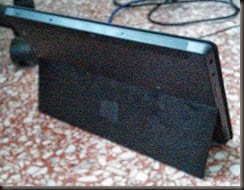
5. Get a 32GB or 64GB MicrosSDHC Class 10. I bought SanDisk Ultra 32GB for RM89 at Digital mall. Well plan to get 64GB but it cost about RM200+. Temporary use 32GB first while waiting for my Seagate 1TB wireless Plus hard disk to arrive from United States. Just plug the microsd card. The microSDXC card slot is located behind of the surface stand. This provides a relatively cheap way to expand the tablet storage quickly. Before you use the microSD, perform the following steps

  • Reformat to NTFS

6. Learn some gesture from Microsoft Guide about Touch from here: http://www.microsoft.com/Surface/en-US/support/touch-mouse-and-search/using-touch-gestures-tap-swipe-and-beyond?lc=1033

or you can learn faster by viewing video:

Using touch, mouse and how to navigate app side by side:- http://windows.microsoft.com/en-us/windows-8/getting-around-tutorial#1TC=t1

7. Download and study the Surface RT, Surface or Surface Pro user guide from http://www.microsoft.com/surface/en-th/support/userguides

8. Install my favorite app by using Microsoft Store

  • Evernote Touch – for note taking
  • Lync – for messenger
  • Dropbox – for cloud storage
  • Kindle – for reading book
  • Google Search – for searching
  • Facebook – for social
  • Google Reader free – for social
  • Adobe Reader Touch– for reading pdf
  • Skype – for messenger
  • Twitter – for social
  • Box -for cloud storage
  • Where is My Water ? 2 – for relaxing (games)
  • My Country – for relaxing (games)

Built –in app on my surface RT:-

  • MS Office Word
  • MS Office Excel
  • MS Power Point
  • MS OneNote
  • MS Outlook

9. Configure email account by clicking on Outlook app. Add outlook.com, gmail and your Exchange email account.

10. Change Cloud Storage primary location to MicroSD card. Go to Windows Explorer | Right click Skydrive | Click Location | Select Move | D:\Skydrive.

This step will ensure that you have more storage space in primary drive.

Note:- Make sure you have complete Step 5 before change Cloud Storage primary location.

One thing i’m realized that my new Surface settings is sync with my laptop. That’s was great. If you encounter weird on keyboard. Do change the keyboard setting to English –United Stated rather than using English-United Kingdom. Some of key is reverse when using English-United Kingdom. Example for key:-

  • @ turned to “
  • “ turned to @

Hope this guide was able to provide some rough idea on how to get started using Surface.

Friday, October 18, 2013

Remote Desktop App For Android and iOS


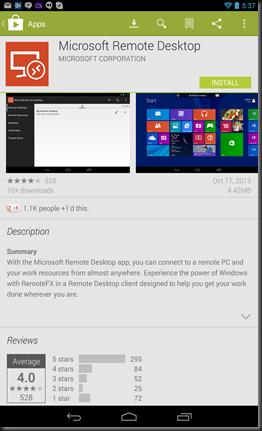
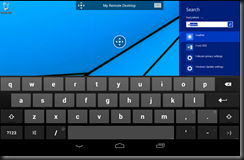
Yesterday during Microsoft Cloud OS Day Event @ Singapore, I have saw a demo of Remote Desktop App on iOS during keynote. Guess what? Today Microsoft has started to release the app to public and this is what I saw on my Nexus 7 FHD Play Store.

2013-10-18 09.37.07

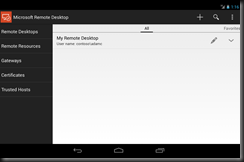
Quick preview on how it look like on Android:- (click the image to view)

b) Enter your corporate detail for Remote Desktop

2013-10-18 09.37.30

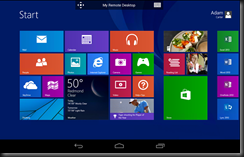
b) Windows 8.1 on Android

2013-10-18 09.38.13

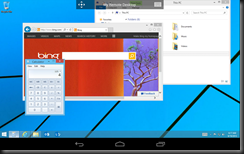
2013-10-18 09.38.55

2013-10-18 09.38.22

2013-10-18 09.39.47

c) RDS application

2013-10-18 09.39.00

Remote Desktop for iOS and Android is now available to download for free, and the links provided below will take you to the download page.

Download:

Veeam: Veeam Management Pack for VMware v6.5


Have you already known that Veeam has new MP 6.5 released?

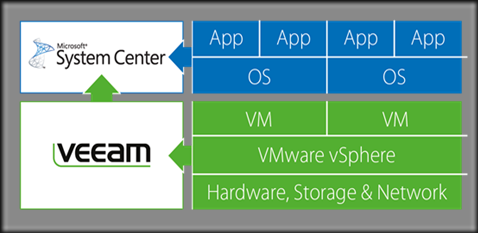
Veeam® Management Pack™ (MP) v6.5 leverages your Microsoft System Center investment to integrate VMware vSphere into app-to-metal management, including monitoring, reporting and capacity planning for Veeam Backup & Replication™

mp_overview_tab

For more information, please check out

http://www.veeam.com/vmware-microsoft-esx-monitoring.html

1379863_10151973986775799_1465310296_n

Thursday, October 10, 2013

Managing StorSimple Using StorSimple Data Protection Console


In our previous post, we have walkthrough by using web console and some configuration. Besides than web console, you can configure StorSimple by using snap-in that separately download from Storsimple website (require to sign in). It’s allows the user to easily creates and manages snapshots, cloud clones and the associated schedules for volumes. By using console, you will be able to perform application consistency backup.

image

Before start configure your backup policy, you are require to configure Volume Group. Do tick the volume that belong to StorSimple. For example:- Y

image

Once a volume group has defined, you will able to configure manual backup or  backup policy.

image

Backup Policy.

The backup policy settings is similar look as web console. You can configure Snapshot, Cloud Snapshot or Cloud Clone. Do check out our previous post about the different meaning of each operation. Here you can configure different operation, retention range and scheduling according to your organization requirement.

image

You can specify retention range of the backup and scheduling as well.

image

Once backup start, you can view each backup copies according to different operation.

image

Restore or Clone

You can restore the entire volume or create a clone. Select Restore will replace the existing data in that particular volume and Clone will assign another volume with different drive letter and allow you to individual restore an items. Do be careful went use the “Restore” action.

image image

image

Once you have copied the require item, you can delete the volume.

Lastly, you can view the action status from Job.

image

Previous post:-

  • Hybrid Cloud Integrated Solution From Microsoft
  • Exploring Hybrid Cloud Integrated Storage- StorSimple
    • Wednesday, October 9, 2013

      Testing Storage Tiering on Windows Server 2012 R2


      Just get my lab ready on Storage Tiering using Windows Server 2012 R2 for next week Microsoft Cloud OS Day @Singapore. My demo environment consist of the following setup

      Demo 1

      a) 1 unit of SATA Disk – 1TB , 1 unit of 240 GB SATA Disk

      Storage Spaces created without storage tiering

      Virtual Disk created with thin provisioning 100 GB on SATA Disk (mirror)

      image

      Without SSD, you cannot do storage tiering and the option is dimmed. Sad smile

      Demo 2

      b) 1 unit of SSD Disk – 240 GB, 1 unit of 1 TB SATA Disk

      Storage Spaces created with storage tiering.

      Virtual Disk created with fixed provisioning

      -50 GB – SSD & 50 GB on SATA (simple)

      image

      With SSD Disk, you will be able to tick “Create Storage Tiers on this virtual disk”. Smile

      On Storage tiering, you can specify the resilient of Mirror or Simple (No redundancy) . Storage Tiering only allow Fixed Provisioning Type.

      image

      Then the next step is put these two demo set into production by putting some virtual machine. So how to test which is better?

      Here is my test result by using

      a) Iometer

      Without Storage Tiering : around 4957 IOps

      image

      With Storage Tiering : around 7742 IOps (Great Performance)

      image

      b) SQLIO

      Without storage Tiering:-

      • IOs/sec : 1122
      • MB/sec : 70.12

      image

      With Storage tiering:-

      • IOs/sec : 4082 (Great Performance)
      • MB/sec : 255.15

      image

      So conclusion, Storage Tiering with write back cache feature on Windows Server 2012 R2 provide a faster and great performance compare to storage spaces without tiering.

      Note:- The figure taken from Iometer and SQLIo is just an example. The result may be varies depend on storage and configuration setup.