Search This Blog

Wednesday, June 29, 2011

Altaro Hyper-V Backup


First of all, thanks to David Vella ( CEO, Altaro - www.altaro.com )  which personally sent me an email to ask on feedback and provide full license key (no expire date) for evaluating Altaro Hyper-V Backup which is currently still in Beta 3. At this moment , this product is still under development. To download, please go to http://www.altaro.com/hyper-v-backup/

The software size is quite small (roughly 12MB) and installation is simple.

At this moment, this product only support for protecting standalone Hyper-V Host. Let quickly go through on the cool stuff about Altaro Hyper-V Backup

Configuration:-

1. Ease, Simple and Single Console. The software was designed to ease user to use without high technical skill. Just follow step 1, 2 and 3 to configure initial configuration.

Step 1: Select Hyper-V VM

Step 2: Select Backup media

Step 3: Configure Notification

image

2. Support on Removable Media and Network UNC. Protected data can store on USB External USB HDD.

image

3. Notification Alert send to Event Log or Email.

image

image

Backup VM:-

image

On Windows VM, online backup is possible by using VSS Provider. Meanwhile for Linux VM (Centos), the VM will be paused, create a snapshot, online and lastly backup by Altaro software. The concept is similar as DPM 2010. You can see the action/process from the top console. Both of my VM is a Dynamics Disk.

Scheduling:-

You can add multiple schedule backup for each VM

image

ReverseDelta Incremental Backup Technology for Super Efficiency

image

Version Maintenance

Allow to automatic purge of backup version.

image

ISO Settings. This option allow you to prevent backup ISO files. We often forget to dismount the iso from the VM. Here is the good options where the backup software can skip backup of any ISO files.

image

Restore VM:-

You can easily restore a VM to original location or Clone the VM with a new VM configuration and path.

image

Since the backup is store on external USB HDD, you can easily move the HDD and import from another Hyper-V Host.

image

Now how fast is the backup & recovery process?

image

It’s pretty fast. 7.35 GB of VM took 5 minutes ,meanwhile 9.98 GB took 9 minutes.

Lastly, a simple dashboard is available to provide the summary of protected data, storage disk size, restore history, etc

image

I’m personally think Altaro Hyper-V Backup is a very good, small and compact product to backup Hyper-V Virtual Machine and good for SME market.

Give it a try and provide a valuable feedback to David:-

[email protected] to make a better product.

Cheers,

“Virtual Lai”

Tuesday, June 28, 2011

Unable to Configure End User Recovery In DPM 2010


You will encountered some problem when try to configure end user recovery using DPM 2010 Administrator Console.

image

Error message:-

image

After Google around, manage to find the solution from Matthijs blog. His blog is teaching you to solve above issue by going to DPMADSchemaExtension.exe tool rather than DPM Console.

Note:- DO NOT RUN IN THE DPM SERVER !!!

If you run DPMADSchemaExtension.exe from the DPM server, you will end up the same error message as above.

Resolution:-

1. Go to Domain Controller Server

2. Map to Z:\ of the EUR location

image

3. Execute DPMADSchemaExtension.exe from the mapping drive.

Thanks to Matthijs and read more on his blog about the process of running DPMADSchemaExtension.exe.

Saturday, June 25, 2011

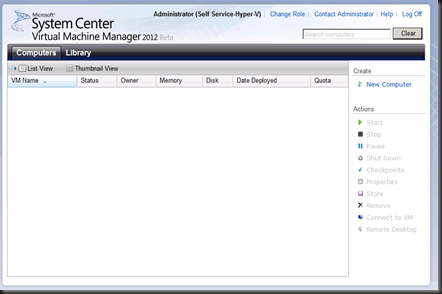
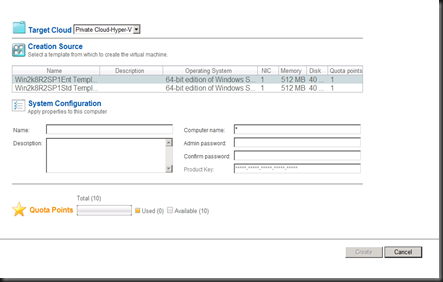
Private Cloud using VMM 2012


I’ve shared about Private Cloud using VMM 2008 R2 and SSP 2.0 either in events or discussion sharing. Now it’s time to move up one level by looking what’s VMM 2012 has offered in term of private cloud.

I will start by describing what’s Private Cloud for those who is still news with virtualization. A Private cloud is a cloud that is provisioned and managed on-premises by an organization. The cloud is deployed using an organization own hardware to take advantages of the cloud model. Using VMM 2012, an organization can manage the cloud definition, cloud assignment, access to cloud and the underlying physical resources.

Let look how’s VMM 2012 configuration on Private Cloud. Some picture is shown as thumbnail as i think it is not important or already available in current version. But you can still view it by clicking on it.

3 Simple steps:

  • Cloud Definition
  • Assignment to Cloud
  • Access to the Cloud

This is the ribbon available for private cloud:-

image

Cloud Definition

Compare to previous VMM 2008 R2 version, VMM 2012 has a another group special for Clouds and no longer using Hosts Group. Below is the sample of 2 Private Cloud which I've created. Each Cloud is dedicated according to hypervisor version .

image

In Cloud definition, you can assign resources based on host group, identify logical network, load balancer, Virtual IP, storage and Library which can use in the cloud.

imageimage

imageimage

imageimage

image

Next, You can define the Capacity Limit for this particular cloud.

image

Then Virtual Machine Capability Profiles based on hypervisor capacity. This can eliminate any mistake during virtual machine provisioning based on hypervisor platform.

image

User Assigment to Cloud

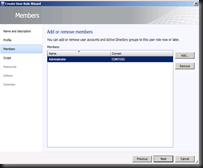
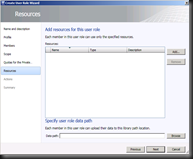
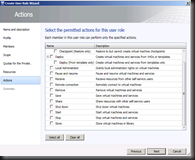
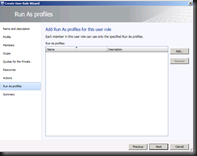
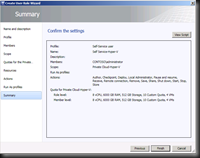
To control access to Private Cloud, you need to assign user to the cloud. During assignment of  Private Cloud, you can configure extra setting such as roles, members, cloud assignment, quota, templates resources and actions to the managed Virtual Machine in the Private Cloud.

imageimage

image

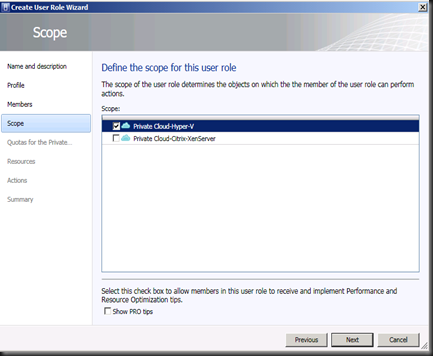
This is the scope that you define to access based on Cloud (which you’ve configured above) and additional cool features is receive PRO TIPS in Self Service Portal.

image

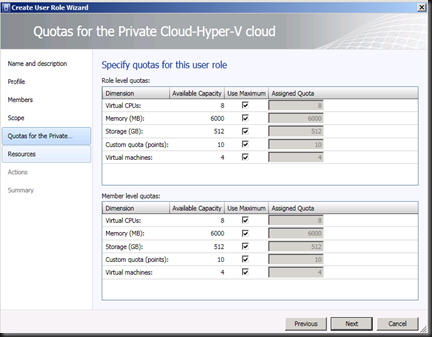
Then, quota assignment for the Private Cloud

image

imageimage

imageimage

Access to Private Cloud

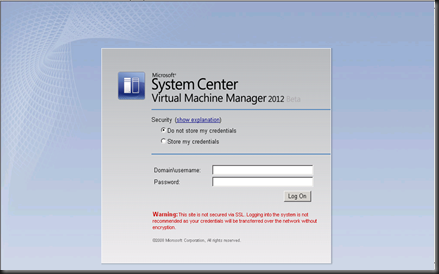
To Access Private Cloud, it is still remain the same layout. Just key in the URL of the self service portal

image

image

image

Neat right. Once Cloud has defined you can look into next stage: Service Management. Check out Service Management using VMM 2012 in this link:_ http://www.ms4u.info/2011/04/deploy-services-via-vmm-2012-beta.html 

Friday, June 24, 2011

Unable to Connect Citrix VM via Console When Using VMM 2012


VMM 2012 Beta has released since few month ago. One of the cool features is the support on managing Citrix XenServer without Citrix XenCenter.

If you have add Citrix XenServer and try managing Virtual Machine running inside XenServer. You will be able to Power on , provisiong VM using template, Stop, etc.

However when you Connect via VMM 2012 Console and you received an error message

" Unable to download VNCControl.msi from (your Xenserver name)”
and unable to Connect via Console. Now here is the resolution to solve this issue.

Resolution

1. Configure DNS to resolve xenserver01

2. On VMM Server, use Internet Explorer to browse

http://xenserver01.ms4u.info/VNCControl.msi

XenServer name: xenserver01

Domain name : ms4u.info

The URL is case sensitive.

3. Install VNCControl.msi

4. Try Connect via Console from VMM 2012 Console. Xen Viewer will open the VM which running in XenServer.

image

Tuesday, June 14, 2011

Backup AzMan using DPM 2010


Not long ago, i had shared about “Azman” in this article : Offline Sharing- Understand AzMan In Hyper-V. Now the question is how do i backup AzMan ?

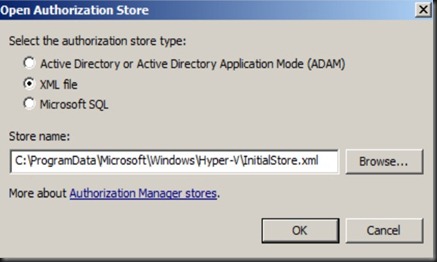
Easy way is navigate to the location where InitialStore.xml is residing and manual backup the file.

2

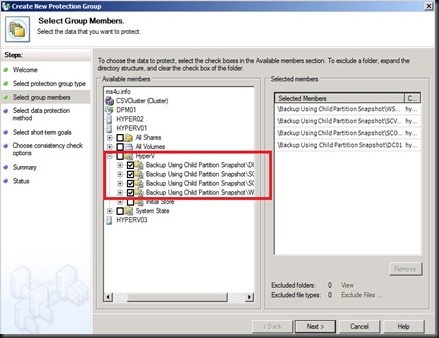
Another way is by using DPM 2010. Normally we overlook the setting and click Next all the way. Let me show you the place where the Initial Store is? This picture is taken from my previous article. Concentrate looking at below the “red box”.

1

Tick Initial Store will automatically backup AzMan configuration.

The initial store contains the security permissions for Hyper-V’s
Authorization Manager (azman). This is an xml file located in
%systemdrive%\ProgramData\Microsoft\Windows\Hyper-V\. You would only need to perform a restore if this xml file becomes corrupt or is deleted somehow.

Backing up virtual machines and the initial store are independent of each other. You only need to back up the initial store if you are using the Authorization Manager in Hyper-V and don’t want to lose your settings.

Sunday, June 12, 2011

Moving Virtual Machine Without Using Hyper-V Export/Import


Howdy ! Ever encounter a problem whereby your existing Hyper-V hardware has a problem and would like to move the VMs to another Hyper-V host. I’m not talking about Export/Import features on Hyper-V.

If you’re interested, keep reading on this article to see how i can achieve this scenario.

In normal hard way which everyone will do, you will probably

1. Export / Import – not a good options if hard disk size is limited and you need to present the VM to another Hyper-V Host in a quick way.

2. Copy and Paste VHD. Recreate VM configuration and assign back existing VHD. – not a good options as i need to key in the ip address on the VM and longer duration of copying/paste process.

3. Restore from DPM – good if total VM faulty but it will took very long process to restore. So far based on my experience is 1GB per minute. If you have 100GB fixed disk VM, will most likely took you 100 minute (just estimation).

4. Use Quick Storage Migration – not applicable as i need additional storage.

5. Use Live Migration – i’m not using Cluster Hyper V.

6. Use Migrate to move VM from 1 host to another – good but slow and i need HDD space/ present new LUN to new Host.

How about total failure but you have managed to copy the whole VM configuration, snapshot and VHD? We can’t use back the VM configuration as you did not export the VM.

Do i get your interest to read more….. (scroll down…)

Here is my real experience on how to achieve this scenario without using Export/Import.

1. Make sure the VM is stopped / Saved State.

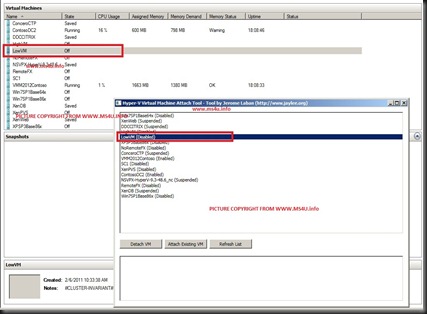
2. Use Hyper-V Mover tool to detach the VM. This will remove hard link from Hyper V host. Example: LowVM Virtual Machine.

1

2

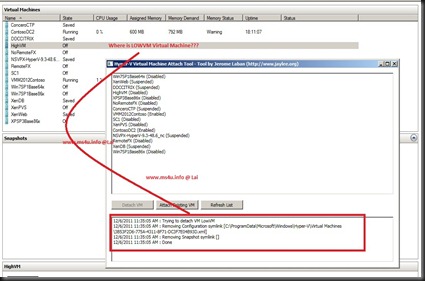
3. On Hyper-V manager snap-in, LowVM Virtual machine has detached and you no longer see it on the snap-in.

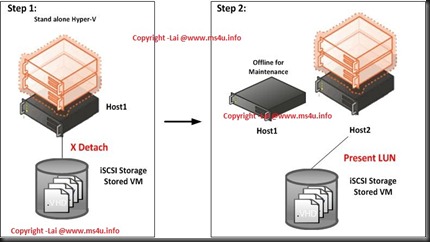
4. Reassign the LUN to another Hyper V Host.

Overview

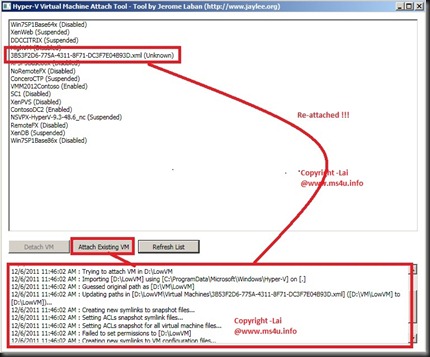
5. Use Hyper-V Mover tool to attach the VM. The tool will detect new location by itself and add to new Hyper-V Host. Click on below picture to see the process of attaching.

3

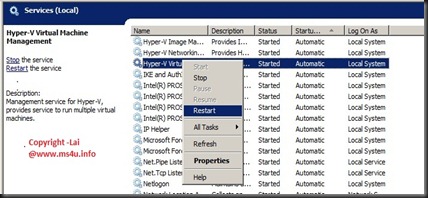
6. Restart Hyper-V Virtual Machine Management services

4

7. On Hyper-V Manager snap-in, you will see the LowVM Virtual Machine has added to the new Hyper-V Host.

Quite easy and fast process (less than 1 minute).

Some thoughts on this tool :

  • A VM can only be detached if it is in the "Saved" or "Stopped" state.
  • It is not necessary to stop the Hyper-V service and all modifications are detected live by the service.
  • A VM can only be imported if it contains at least on HDD on the IDE 0 controller.
  • All the VM files must be under the same directory, HDD and snapshots.
  • All files that are modified are backed-up next to the original files; All other files are not modified nor moved.
  • .NET 3.5 must be installed.

It’s provided free by Microsoft CodePlex. To get it, please click here.

Note:- Use Hyper-V Mover on your own risk.

Thursday, June 9, 2011

Offline Sharing: Understand AzMan In Hyper-V


This month is my last month as MVP : Virtual Machine. A year has passed so far and i still remember when i was awarded as MVP : Virtual Machine on 1st July 2010 – 30th June 2011 (a year). Time to do countdown and waiting on 1st July 2011 to announce about my renewable MVP status.

Before my award end this month, here is my contribution to MVUG members or blog visitors. This is an offline sharing and no schedule webcast on this session. Time for me to take a break and spend few days left before 1st July 2011.

Recording demo will upload soon.

Lastly thank you on your support.

Best regards,

Lai Yoong Seng (MVP: Virtual Machine)

Monday, June 6, 2011

Convert XenServer VHD To Hyper V VHD


Previously Citrix has a tool called “Project Kensho ver 1.3” which is under experimental to convert Vmware or XenServer to Hyper V VHD. More information about this tool:- http://community.citrix.com/display/xs/Kensho.

However it no longer available to download from MyCitrix website.

Citrix has included this tool into Citrix XenServer 5.6 and you can use XenCenter to perform import and export appliance. Bear in mind, it is not a conversion tool and may not be 100% working.

Test scenario:-

a) Hyper V Host running Windows Server 2008 R2 with SP1

b) Citrix XenServer 5.6 SP2

c) XenCenter

d) In my simulation lab, i have converted Citrix Virtual Appliance (running Windows Server 2008 R2) & one virtual machine running in Citrix XenServer 5.6 SP2 (Windows Server 2008).

Here is how i perform this tasks:-

1. To use it, go to XenCenter console. Select Tools | Virtual Appliance Tools | Export Appliance

image

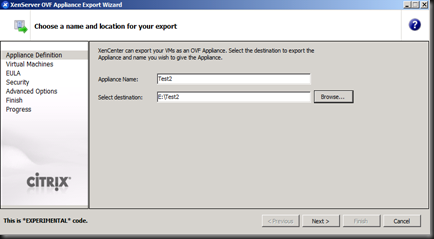
2. Give a name of the export appliance and set the destination

image

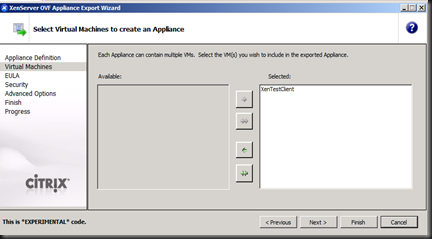
3. Select the VM

image

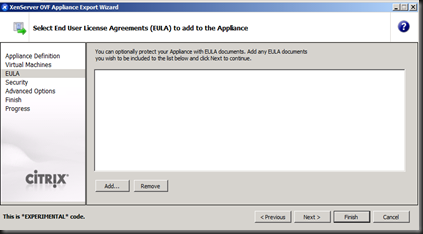
4. On EULA page, just click Next

image

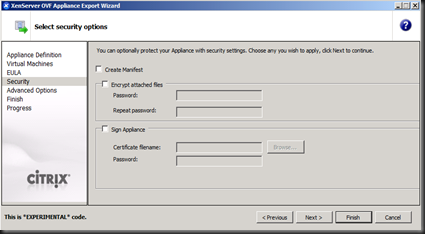
5. On Security options, leave it default and click Finish.

image

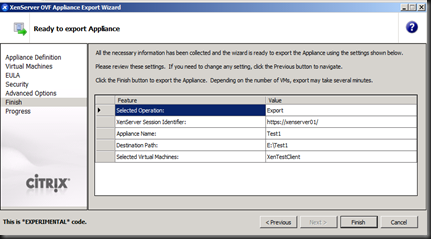
6. On Ready to export Appliance, review the setting and click Finish to start exporting

image

7. The Export process will take a while.

image 

The final result is a VHD has exported. Copy the VHD to Hyper V Host, create a new VM configuration and assign HDD to the converted VHD.

Final step is start the VM, uninstall Citrix Tool for Virtual Machine and install Hyper V Integration Component. Once done, reboot the VM and you are set to go.

Note: This tool is still under experimental.