[Download]
1. OS - https://www.oracle.com/solaris/solaris11/downloads/solaris-downloads.html
Select "Installation from CD/DVD"
Select "x86 Text Installer" to download the iso
2. Oracle Solaris Zone Template - https://www.oracle.com/solaris/solaris11/downloads/solaris11-vmtemplates-zones-downloads.html
Select "Download x86 - Oracle VM template for Oracle Solaris 10 Zone
[Installation OS]
Create a VM with the spec
- 4 vcpu
- 8GB RAM
- 30 GB HDD
Follow step to configure the installation:- http://www.ms4u.info/2018/06/install-oracle-solaris-113.html
After installation, transfer the VM Template using WinSCP Tool
[Installation Oracle Vm template]
1. Rename the file without .bin and make the download file executable
mv solaris-10u11-x86.bin solaris-10u11-x86
chmod +x solaris-10u11-x86
2. create a folder /cpool using mkdir comamnd
3. start installation with the following command
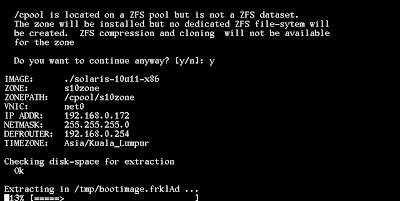
./solaris-10u11-x86 -p /cpool -a 192.168.0.172/24 -i net0 -f -z s10zone
Note: IP address refer to your own Oracle Solaris IP
If encounter not enough free swapfile, you can increase using "swap" command
Guide:-
https://docs.oracle.com/cd/E23824_01/html/821-1459/gizfl.html
Installation started.....
Enjoy!


