Last week, Veeam has just released this product and I have downloaded this bits to play around in my lab environment. In today article, we are going add Windows Azure as the platform to store the backup data.
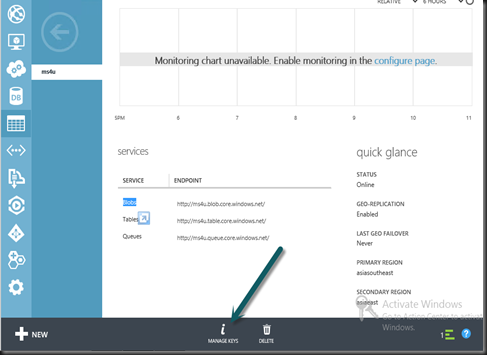
1. Login to Windows Azure Portal and create storage account.
2. Once you have create the storage, get the key. Just click “Manage Key”
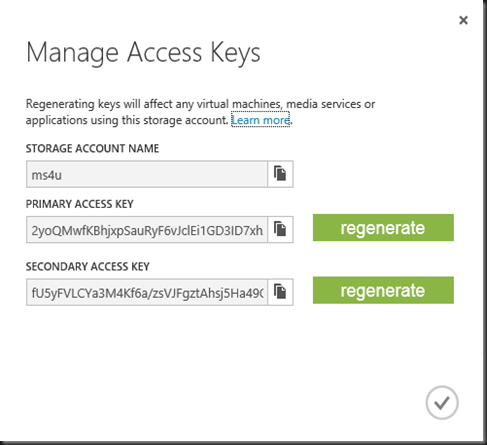
3. Below is the sample of the storage account name that I’ve created. Copy the primary access key and back to Veeam Backup and Replication Server.
4. If not yet download the product, please click here. Once download, install the cumulative patch 2 (20MB) first before proceed to install the Cloud Edition (12 MB) on top of Veeam Backup and Replication 6.5. Once install, a new icon on your desktop is displayed : “Cloud Backup”.
5. Double click the icon and access the console. Here is the list of the supported cloud storage that you can use with Veeam Backup and Replication Cloud Edition. Click File to view
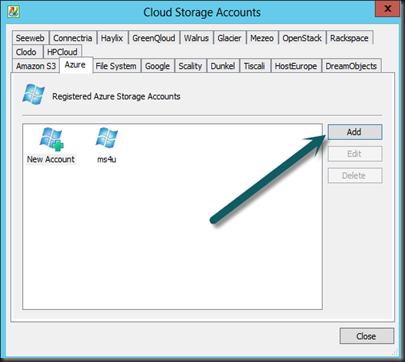
6. In our case, let select “Windows Azure Storage Account”
7. Click Add Windows Azure Storage to register.
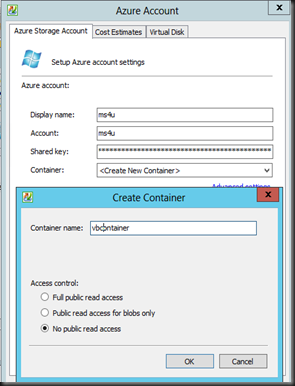
8. Enter the following details:
- Account – (register storage account name)
- Shared key – (primary access key)
- Container – create a new container to store the backup.
This is the step on how easy to add a Windows Azure Storage Account. On next post, we are going to explore on Configure Backup using Veeam backup and replication cloud edition.


